
6 Crucial Deadlift Form Tips for Max Lifts in 2025
The deadlift is the undisputed king of strength exercises, a full-body testament to raw power. But lifting heavy is only half the battle; lifting correctly is what separates seasoned athletes from sideline spectators. Poor technique not only stalls progress but also paves the way for serious, preventable injuries that can set you back for months. This guide moves beyond generic advice, offering a comprehensive breakdown of the most critical deadlift form tips that address the nuanced mechanics of this foundational lift. We're not just telling you what to do, we're showing you how to do it with actionable strategies.
From mastering the foundational hip hinge to perfecting your bar path and engaging your lats for maximum stability, each principle is a critical piece of the strength puzzle. You will learn to create a powerful base, maintain a neutral spine under load, and keep the barbell exactly where it needs to be for the most efficient pull. By implementing these specific, detailed strategies, you will build a safer, stronger, and more powerful deadlift. This will set the stage for smashing through plateaus, achieving new personal records, and unlocking your true strength potential. Let's build a better deadlift, starting now.
1. Master the Foundational Hip Hinge Pattern
Before a single pound is loaded onto the barbell, your first priority must be to perfect the hip hinge. This movement is the fundamental engine of the deadlift. It's not a squat, where you initiate by bending the knees and dropping your hips down. Instead, the hip hinge is a powerful posterior-chain movement initiated by sending your hips backward, as if you're trying to touch a wall behind you with your glutes.
This backward hip travel is what loads your hamstrings and glutes with tension, turning them into coiled springs ready to explode forward and lift the weight. Many lifters make the critical mistake of "squatting" their deadlifts, which shifts the work to the quads and can place dangerous shearing forces on the lumbar spine. Mastering the hinge is one of the most crucial deadlift form tips for both safety and performance.
How to Engrain the Hip Hinge
To build this pattern into your muscle memory, you need dedicated practice. Start without any weight and focus on the sensation of loading your posterior chain.
- Dowel Rod Drill: Hold a light dowel rod or PVC pipe vertically along your back. It should maintain three points of contact: the back of your head, your upper back (thoracic spine), and your sacrum (just above your tailbone). Hinge at your hips by pushing them backward while keeping a soft bend in your knees. If the rod loses contact with any of these three points, your form has broken down, likely because your back has rounded.
- Wall Taps: Stand about six inches in front of a wall, facing away from it. With your feet shoulder-width apart, hinge at your hips and try to tap the wall with your glutes. The goal is to reach the wall without bending your knees excessively. As you get better, take a small step forward to increase the distance and challenge your hamstring flexibility and hinge depth.
Key Insight: A proper hip hinge feels like a stretch in your hamstrings at the bottom of the movement. If you feel it primarily in your quads or lower back, you are likely squatting or rounding your spine.
This foundational skill is non-negotiable for anyone serious about lifting. It protects your back, maximizes your strength, and sets the stage for a powerful pull. For those just starting their strength journey, understanding fundamental movements like this is paramount. You can explore more about building a solid foundation in our guide on powerlifting for beginners. By dedicating time to these simple drills, you ensure the hip hinge becomes an automatic, powerful, and safe component of your deadlift.
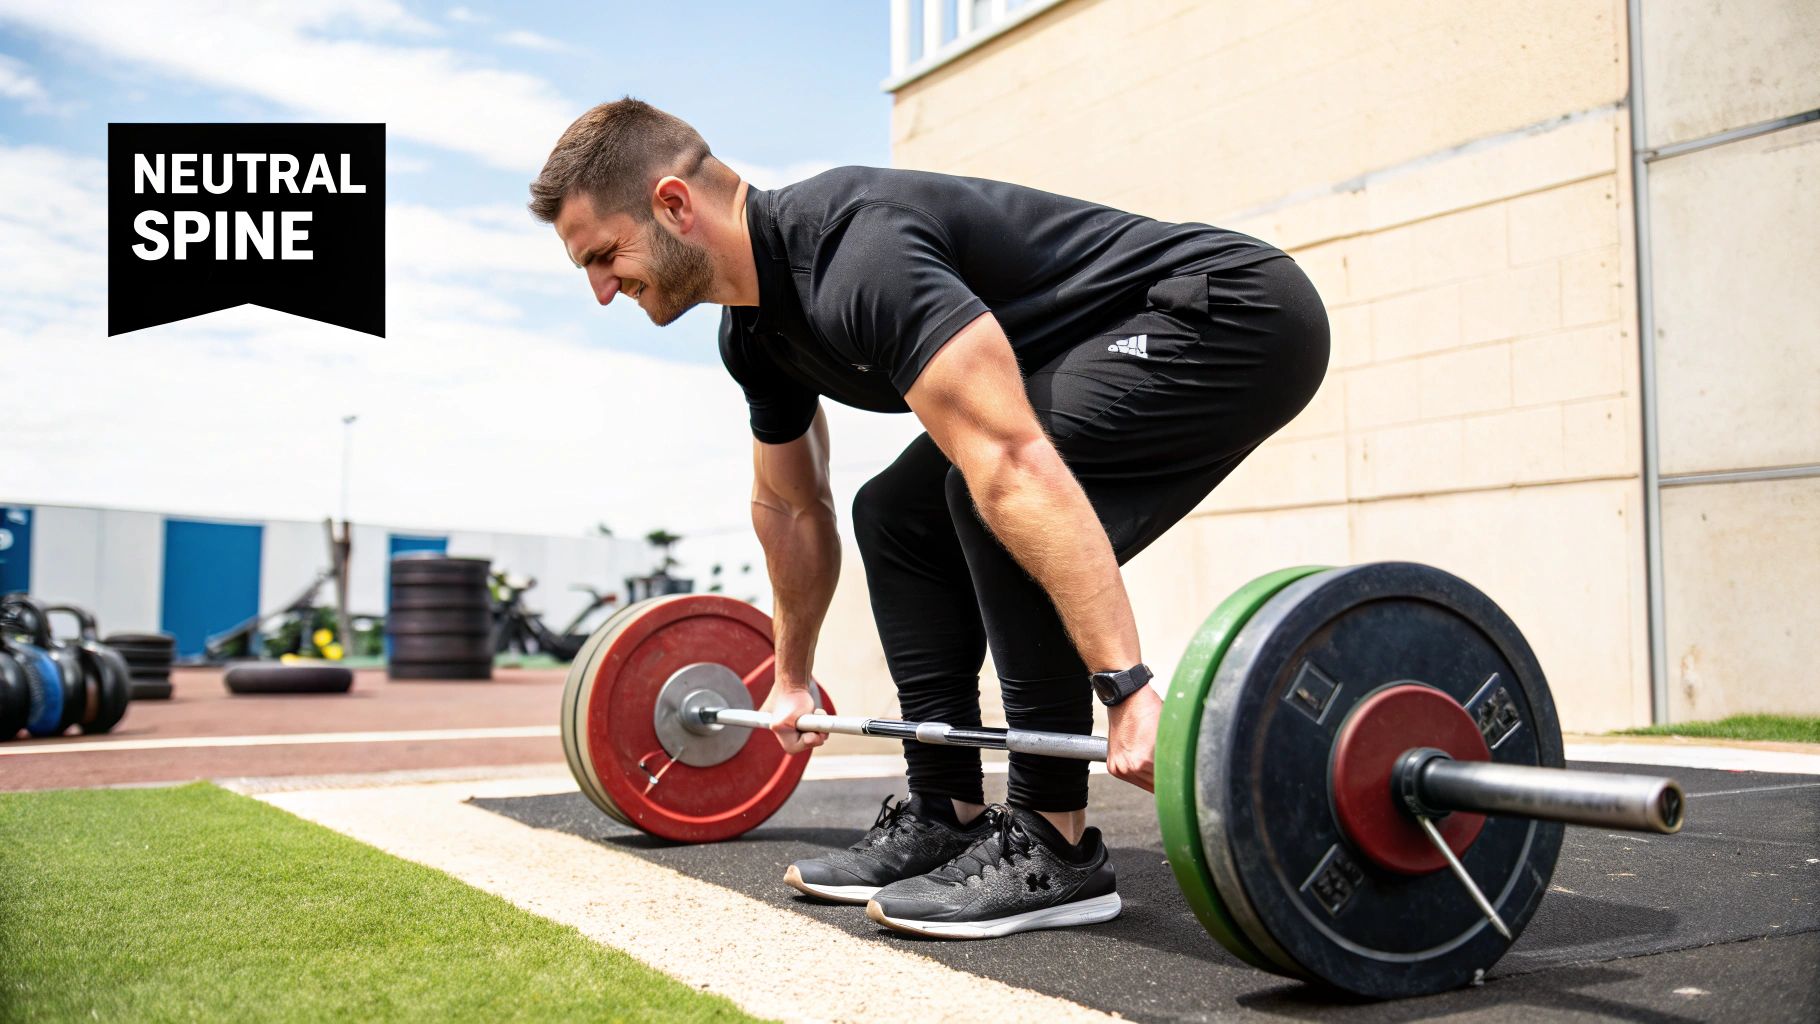
2. Maintain a Neutral Spine at All Costs
Following the hip hinge, the next non-negotiable principle is maintaining a neutral spine throughout the entire lift. A neutral spine means preserving the natural, gentle curves of your vertebral column without any excessive rounding (flexion) or arching (extension). This alignment is the single most critical factor for safety, as it allows forces to be distributed evenly across the vertebrae and supportive musculature, rather than being dangerously focused on a single point.
When the spine rounds, especially the lower back, it shifts the load from the powerful muscles of your posterior chain to the passive structures of your spine, like ligaments and intervertebral discs. This is a primary mechanism for serious injury. Powerlifters like Cailer Woolam and physical therapy protocols alike emphasize this position because it is fundamental to both expressing maximum strength and ensuring long-term spinal health. Adhering to this is one of the most vital deadlift form tips you will ever receive.
How to Lock in a Neutral Spine
Achieving and holding a neutral spine requires conscious effort and a strong, braced core. This isn't just about "keeping your back straight"; it's an active process of creating stability from the inside out.
- Brace Like You're About to Be Punched: Before you pull the slack out of the bar, take a deep "belly breath" into your diaphragm, not your chest. Then, tighten your entire core-abdominals, obliques, and lower back-as if you are preparing for an impact. This intra-abdominal pressure acts like a natural weightlifting belt, creating a rigid cylinder around your spine.
- Set Your Lats and Keep a "Proud Chest": Actively engage your latissimus dorsi muscles by imagining you are squeezing oranges in your armpits. This action pulls the barbell in close to your body and prevents your upper back from rounding. Simultaneously, think "proud chest" or "show the logo on your shirt to the wall in front of you" to set your thoracic spine in a strong, extended position.
- Use Video Feedback: Your perception of your back position can be misleading, especially under a heavy load. Record your sets from a side angle to objectively assess your spine. Look for any rounding as you initiate the pull or as fatigue sets in on later reps.
Key Insight: A neutral spine is not a perfectly flat back. It's the preservation of your spine's natural curvature. Focus on creating 360-degree tension around your midsection to stabilize this position, rather than simply trying to arch or flatten your back.
Pioneered and heavily researched by experts like Dr. Stuart McGill, the concept of spinal neutrality is the bedrock of safe, effective lifting. It transforms the deadlift from a high-risk gamble into a powerful tool for building strength. By bracing correctly and using cues to maintain your posture, you build a resilient foundation for every single rep.
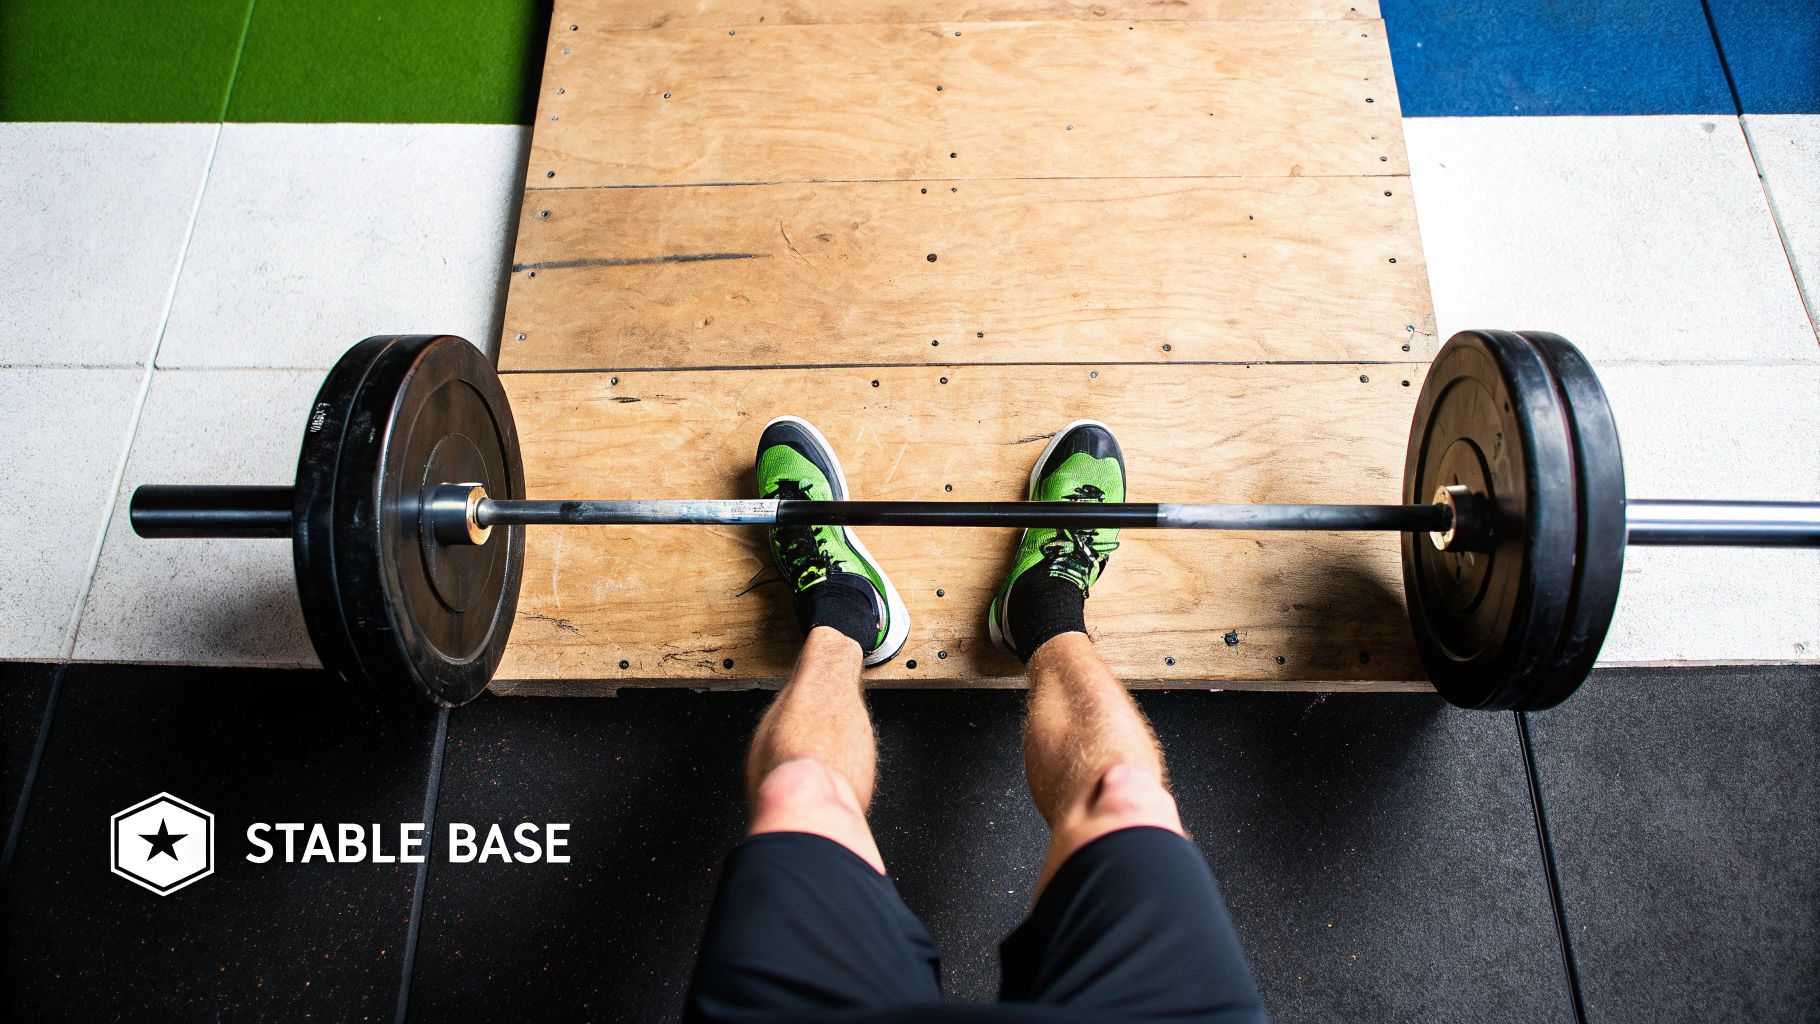
3. Proper Foot Position and Base of Support
Your connection to the ground is the starting point for every ounce of force you generate in a deadlift. Just like a skyscraper needs a solid foundation, your body requires a stable base of support to pull maximal weight safely and efficiently. Establishing the proper foot position ensures your power is transferred directly into the barbell, rather than being lost to instability or poor leverage.
This means finding a stance that is typically between hip and shoulder-width apart. This alignment allows your arms to hang straight down outside your legs without interference, creating a direct line of pull. It also enables your knees to track properly over your feet as you bend to grip the bar, which is a critical detail in our deadlift form tips for protecting your joints and maximizing glute and hamstring engagement.
How to Dial In Your Stance
Finding your unique, optimal stance doesn't require complex tools, just a bit of experimentation and body awareness. Your anatomy will ultimately dictate the perfect position for you.
- The Jump Test: Stand relaxed and perform a small vertical jump, landing naturally. The position your feet land in is often your body's most powerful and stable stance. This is an excellent starting point for your conventional deadlift setup.
- Weight Distribution: Focus on keeping the pressure distributed across your mid-foot, feeling like your entire foot is "gripping" the floor. Avoid shifting your weight to your toes, which can pull you forward, or to your heels, which can compromise balance and power.
- Shoe Choice: Your footwear matters immensely. Opt for flat-soled shoes (like Converse or specialized lifting shoes) or even lift barefoot. This provides a solid, non-compressible surface that enhances your stability and connection to the floor. Thick, cushioned running shoes are a poor choice as they can create instability.
Key Insight: A correct foot stance allows your shins to be nearly vertical when viewed from the front, and it places your hips in the most powerful position to drive the lift. If your knees are caving inward, your stance may be too wide or your toes angled out too far.
This foundational setup is a non-negotiable step championed by renowned coaches like Mark Rippetoe and Dave Tate. By optimizing your base, you ensure that the immense force generated by your body has a direct path into the barbell. Just as your lifting form is crucial, so is the fuel you provide your body to perform and recover. You can read more about how to support your training with our guide on nutrition for strength training. Taking the time to perfect this small detail will pay huge dividends in both strength and safety.
4. Optimal Grip Width and Hand Placement
Your hands are the direct connection to the barbell, and how you grip it can make or break your lift. Optimal grip width is simple yet crucial: your arms should hang straight down from your shoulders, with your hands placed just outside your shins. This creates the most direct and efficient line of pull, ensuring your arms function like strong, unbending chains. Placing your hands too wide shortens your arms and forces your hips to start lower, while a grip that is too narrow can interfere with your leg drive.
A secure grip is one of the most fundamental deadlift form tips because if you can't hold onto the bar, you can't lift the weight, no matter how strong your back and legs are. The goal is to find a grip that is both powerful and sustainable, allowing you to transfer maximum force from your body into the barbell without compromising your setup or creating muscular imbalances.
How to Find and Improve Your Grip
Finding your ideal grip width is straightforward, but choosing the right grip style depends on your goals and strength level. Experiment with these methods to see what works best for your training.
- Double Overhand Grip: This is the foundational grip where both palms face you. It should be your default for warm-ups and lighter sets to build formidable grip strength naturally. It's the most symmetrical and safest grip for your biceps.
- Mixed Grip (Alternated Grip): Used for heavy attempts, this grip involves one palm facing forward (supinated) and one facing backward (pronated). This technique, famously used by Andy Bolton for his historic 1,000lb deadlift, prevents the bar from rolling out of your hands. Remember to alternate which hand is supinated between sets to prevent muscular imbalances.
- Hook Grip: The standard in Olympic weightlifting and used by powerlifters like Benedikt Magnusson for his former world record, the hook grip involves wrapping your thumb around the bar first, then locking it in place with your index and middle fingers. It offers incredible security but requires a significant pain tolerance to master. Start using it on lighter sets to condition your thumbs.
Key Insight: Your grip width is correct when your arms are perfectly vertical at the start of the pull. If your arms are angled inward or outward, you are losing mechanical efficiency. Use chalk to enhance friction, which allows you to secure the bar without over-gripping and fatiguing your forearms prematurely.
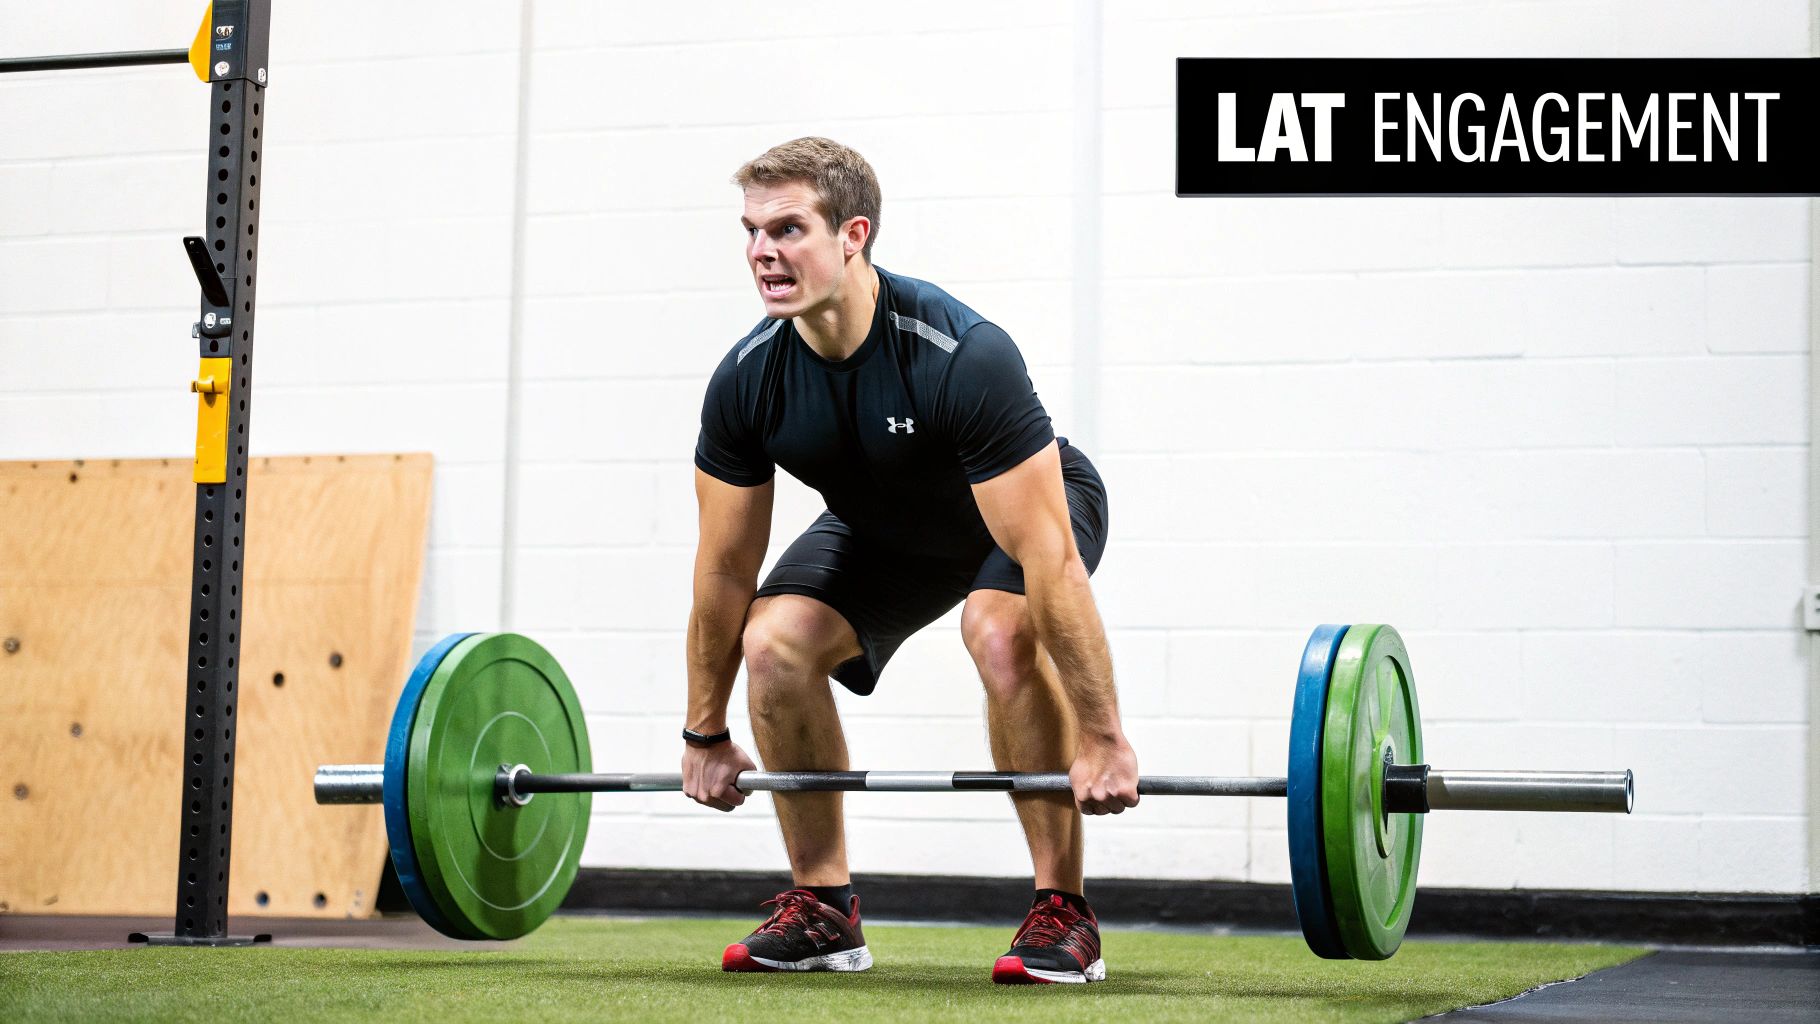
5. Lat Engagement and Upper Back Tightness
Once your hip hinge is solid, the next step is to create a rigid, unmoving torso by actively engaging your latissimus dorsi (lats) and upper back muscles. This "lat lock" is a non-negotiable component for a strong and safe deadlift. It works by pulling the barbell into your body, effectively making it an extension of your own arms and torso. This prevents the bar from drifting forward, a common mistake that increases the lever arm and places immense stress on the lower back.
Engaging your lats keeps your shoulders pulled down and back, preventing the upper back from rounding as you initiate the pull. Powerlifters like those in the IPF and strongman athletes demonstrate this principle flawlessly; their upper back remains a solid block of steel from the floor to lockout. This tightness creates the most efficient bar path possible, allowing you to transfer force directly from your legs and hips into the bar. These deadlift form tips are crucial for turning a good lift into a great one.
How to Achieve a Vise-Like Lat Lock
Activating your lats isn't passive; it requires conscious effort and specific cues. You should feel tension through your entire upper back and armpits before the bar even breaks the floor.
- "Bend the Bar" Cue: As you grip the bar, imagine you are trying to bend it around your shins. This external cue forces you to engage your lats, externally rotate your shoulders, and pull them down and away from your ears. You should feel your armpits tighten immediately.
- "Protect Your Armpits" Cue: Another powerful mental trick is to think about protecting your armpits from being tickled. To do this, you must squeeze your lats down hard, creating the same tension needed for the lift. This keeps the lats fired throughout the entire range of motion.
- Strengthen with Accessory Work: If you struggle to feel your lats, dedicate time to building them. Heavy rows, pull-ups, and lat pulldowns are essential. When performing lat pulldowns, focus specifically on depressing your shoulder blades first before pulling the bar down to better isolate the lat muscle.
Key Insight: A properly engaged upper back and lat system will make you feel "connected" to the barbell. The bar should move straight up your shins and thighs, almost scraping them. If it drifts away from you, your lats have disengaged.
Locking in your upper body is a game-changer that immediately adds stability and power to your pull. By creating this full-body tension, you build a stronger, more resilient physique ready for heavier loads. If you're serious about building this kind of foundational strength, you can discover more strategies in our guide on how to get stronger. Mastering this technique protects your spine and ensures every ounce of force you generate contributes directly to lifting the weight.
6. Proper Bar Path and Proximity to Body
The shortest distance between two points is a straight line, and this principle is the key to an efficient and powerful deadlift. An optimal bar path is a perfectly vertical line from the floor to the lockout position. The barbell should maintain contact, or at least be in extremely close proximity, to your body throughout the entire lift, essentially "scraping" your shins and thighs on the way up.
This straight, close path minimizes the horizontal distance the weight has to travel, reducing the leverage disadvantage and the strain on your lower back. When the bar drifts away from your body, it creates a longer moment arm, forcing your lumbar spine to work harder to stabilize the load and making the lift significantly more difficult. Adhering to this principle is one of the most impactful deadlift form tips for maximizing your strength and protecting your spine.
How to Maintain a Straight Bar Path
To achieve this vertical path, you need to be intentional about your setup and execution. The goal is to make your body move around the bar, not the bar move around your body.
- Setup is Key: Position the barbell directly over your mid-foot before you even grip it. This initial placement is critical because it sets the center of mass for the entire system (you and the bar) in the most biomechanically advantageous spot. A bar that starts too far forward will inevitably pull you forward and away from an efficient path.
- "Drag" the Bar: Actively think about pulling the bar back into your body and "dragging" it up your legs. This cue helps engage your lats, which play a crucial role in keeping the bar close. Visualize your lats as arms that are pulling the bar into a tight, vertical channel against your shins and thighs.
- Protect Your Shins: Elite lifters often wear long, thick socks or deadlift shin guards for a reason. The goal is to keep the bar so close that it scrapes your shins. Protecting your skin allows you to commit to this technique without hesitation or injury, ensuring you don't subconsciously push the bar forward to avoid the scrape.
Key Insight: Film your lifts from a side angle. An ideal deadlift will show the barbell traveling in a straight vertical line. If you see the bar swing out and away from your legs or loop around your knees, it's a clear sign that your lats are not engaged or your initial setup was off.
By focusing on a tight, vertical bar path, you transform the deadlift from a lower back-dominant struggle into a powerful, hip-driven movement. This technique, emphasized by renowned coaches like Mark Rippetoe, ensures that every ounce of force you generate is directed into lifting the weight vertically, leading to safer, stronger, and more efficient pulls.
Deadlift Form Tips: 6 Key Factors Comparison
| Aspect | Proper Hip Hinge Pattern | Neutral Spine Alignment | Proper Foot Position and Base of Support | Optimal Grip Width and Hand Placement | Lat Engagement and Upper Back Tightness | Proper Bar Path and Proximity to Body |
|---|---|---|---|---|---|---|
| Implementation Complexity 🔄 | Moderate to High; requires practice | High; demands core strength and focus | Moderate; requires individual adjustments | Moderate; mastering multiple grips needed | Moderate; practice to coordinate with hip hinge | High; precise setup and consistent technique |
| Resource Requirements ⚡ | Low; needs practice and mobility drills | Moderate; needs core strengthening exercises | Low to Moderate; mobility and footwork drills | Low; grip tools like chalk helpful | Low to Moderate; upper back strengthening needed | Low; video feedback and protective gear advised |
| Expected Outcomes 📊 | Improved posterior chain strength & injury reduction | Reduced injury risk; efficient force transfer | Increased stability and force production | Enhanced grip strength; heavier loads possible | Improved bar path efficiency; upper back strength | Maximum mechanical efficiency; lower energy use |
| Ideal Use Cases 💡 | Powerlifting, Olympic weightlifting, general strength | Rehab, injury prevention, heavy lifting | Powerlifting, strongman, general balance | Powerlifting, Olympic lifting, grip training | Heavy lifting, powerlifting, injury prevention | Heavy deadlifts, technique refinement, injury prevention |
| Key Advantages ⭐ | Safer lifting; greater load capacity | Protects spine; strengthens stabilizers | Stability; natural joint tracking | Maximizes leverage; prevents bar drift | Rigid torso; protects lower back | Minimizes horizontal bar movement; energy saving |
Smash Your Plateaus by Building a Technical Foundation
Mastering the deadlift is not about a single, magical fix. It's a continuous journey of technical refinement, where small adjustments yield significant gains in both strength and safety. The principles we've explored are not just a checklist but an interconnected system. Your ability to execute a perfect hip hinge is directly supported by maintaining a neutral spine, which is stabilized by a rock-solid base from your feet and immense upper-back tightness.
Think of these deadlift form tips as the foundation of a skyscraper. Without a deep and solid base, you can only build so high before structural integrity is compromised. The same is true for your deadlift. Chasing heavier weights without first ingraining these technical patterns is a recipe for hitting a frustrating plateau or, worse, sustaining a preventable injury. True strength is built on a bedrock of flawless technique.
Key Takeaways for Your Next Session
As you approach the bar for your next deadlift session, move beyond just thinking about the weight. Instead, focus your mental energy on these crucial elements:
- Own the Setup: Dedicate 80% of your focus to the setup. Ensure your feet are grounded, your spine is neutral, your lats are engaged pulling the bar into your shins, and you feel tension through your entire posterior chain before the pull even begins.
- The Bar is Your Partner: Treat the barbell as an extension of your body. Your goal is to keep it as close as possible throughout the entire lift, tracing a straight, vertical line from the floor to lockout. Any deviation from this path is wasted energy.
- Film, Review, Refine: Your phone is one of the most powerful coaching tools you own. Record your sets from the side and front to objectively assess your form. Are you maintaining a neutral back? Is the bar path vertical? This feedback is invaluable for making precise corrections.
Your Actionable Next Steps
Instead of adding another plate to the bar next week, try this: deload the weight by 20-30% and dedicate an entire session to technical practice. Perform each rep with deliberate, surgical precision, focusing on the feeling of each component we discussed. This intentional practice builds the neuromuscular connections that make perfect form second nature, allowing you to lift heavier and more safely in the long run.
Ultimately, these deadlift form tips are your blueprint for long-term success. By embracing the process of technical mastery with the same intensity you bring to lifting heavy, you are not just building a stronger deadlift; you are building a more resilient, powerful, and injury-proof body. Now, take this knowledge, apply it with patience and purpose, and get ready to redefine what you thought was possible.
Ready to fuel your refined technique and accelerate your recovery? Support your strength gains by ensuring you never miss your daily creatine dose with the convenient and delicious gummies from Smash.com. Visit Smash.com to see how our mess-free solution can help you stay consistent and smash your performance goals.